
Join Our
Circle of Friends!
eNewsletters
Exercise Articles, Products & Equipment
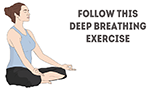
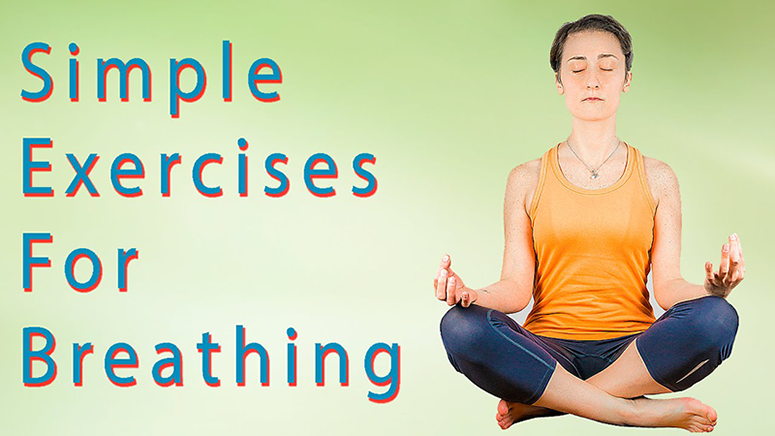
Three Part Breathing Exercise (Part 1)
 |
Energy is the vital life force that pervades all of existence. Where the source of life and expression of the divine spirit are supported by modern physics. It is said that our creative potential is comprised of this energy.
Energy is something we can feel in the body in various ways. It is the fundamental life force that animates our physical being. And, energy is intimately linked to breathing. Breathing serves as a vehicle for regulating the flow of energy throughout the body. How aware are you of your breathing? Is it fast or slow? Is it deep or shallow? Is it relaxed or strained? If you have health concerns, consider the role breathing might have in your healing process.
This article is Part I of a three-part series that will help us focus on each stage of breathing and the effects it has on our healing energy. This is a basic preparatory practice that brings awareness to the way we breathe and forms the foundation of healthy breathing. How we breathe can heat us up or cool us down, energize us or put us into a state of relaxation.
To begin, let’s look at some of the advantages of controlled breathing.
Benefits
 |
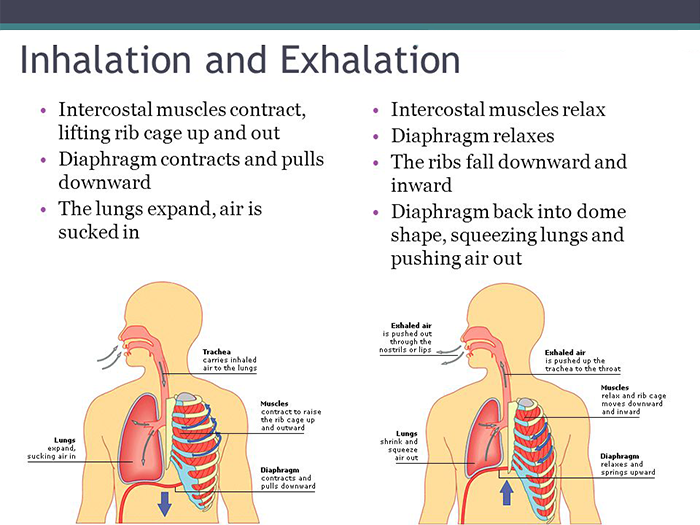
The first step is to develop awareness of the movement of breathing in the abdomen. We begin by focusing on the abdomen with either a firm (tightened muscles) or soft (relaxed) belly. If breathing practices are new to you, begin with a soft belly. This is an area where we tend to hold a tremendous amount of tension. It is important to release the tension associated with abdominal complaints such as constipation and diarrhea which can manifest in more serious conditions of the digestive tract. Additionally, the parasympathetic system will be activated, particularly during long exhalations. Abdominal breathing allows for the organs to expand and move out of the way as the diaphragm descends on inhalation. Those with poor posture, shallow breathing and constricted abdomens will benefit most from this practice. Once soft belly breathing has been mastered, proceed with firm belly breathing to strengthen the diaphragm. When the abdomen is held firmly, the diaphragm muscle must work harder and is therefore strengthened. Respiratory capacity increases with a strong diaphragm muscle. Firm belly breathing also has the potential to lengthen, stabilize and create space in the vertebrae because the main tendons of the diaphragm are attached to the lumbar spine. Strong breathing equals a strong spine!
Technique
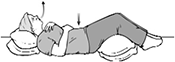 |
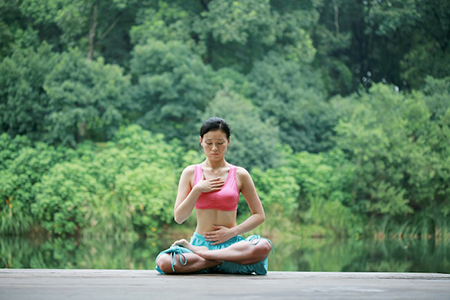
Depending on your physical condition, choose one of these three positions.
 |
Place your hands on your abdomen and inhale completely, slowly and continuously, expanding the abdomen and the lower sections of the lungs like a balloon. Before exhaling, allow the lungs to naturally pause without strain. While exhaling, draw the abdomen inward continuously and slowly. Before reversing the process pause your breathing again effortlessly and then inhale. Repeat this breathing cycle, focusing on the sensation you feel in the body. Feel the breath of air expanding evenly through the front, sides and back of your body. Use the expansion to actively massage the muscles of the lower back. With each exhalation, feel the abdomen release downward. Feel the force of gravity drawing the diaphragm effortlessly downward on the exhalation. Feel each inhalation as if to reach outward beyond the physical abdomen, enlarging the energy space around the entire abdomen, waist and lower back. Continue this practice for as long as you like maintaining awareness of how the body feels. Notice the difference in the state of not only your breathing but your mind from the beginning to the end of the practice. This is a very useful tool to not only begin your day but also to wind it down.
Practice this breathing awareness until our next segment where we will focus on the second part of this Three-Part thoracic (chest) breathing exercise.
Three Part Breathing Exercise (Part 2)
It is recommended that you practice part 1 before attempting this second part or moving forward to part 3.
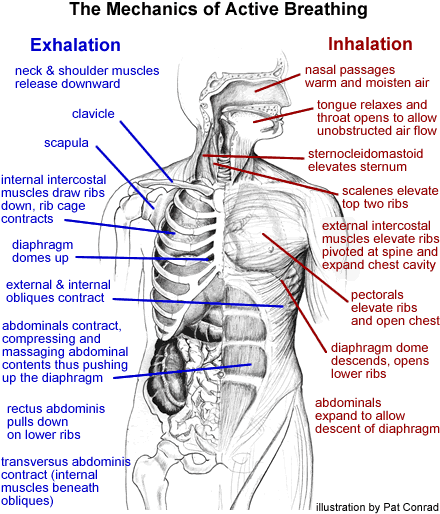
First let’s review the Benefits of Thoracic (Chest) or Intercostal (Ribcage) Breathing.
Technique for Thoracic Breathing
 |
If you have practiced part 1, assume your preferred position. Place your hands on the lower rib cage; you may be able to feel the last two floating ribs (those not attached to the sternum). With each inhalation, allow the lower ribs to expand and press gently out against your hands. Feel this expansion at the front, sides and back of your body. Focus on the area where the ribs attach to the spine and feel the vertebrae lengthen and lift with each inhalation. Pause briefly at the top of the inhalation and at the bottom of the exhalation. Feel the expansion between the ribs and lift of the sternum with each breath. Continue this practice for as long as you like, maintaining awareness of how your body feels. Notice the difference in your state of mind as you move from the beginning to the end of the practice.
Practice your breathing awareness until our final segment of this Three-Part Breathing exercise where we will move to the upper lungs and focus on, Clavicular Breathing.
NOTICE: This breathing may aggravate some spinal conditions or back injuries. Stay focused at all times throughout this exercise and stop when you feel it is appropriate. No content contained in this article is intended as, or should be construed as, medical advice. Always consult a physician before starting or stopping any exercise regimen.
Three Part Breathing Exercise (Part 3)
This is Part 3 of our Three-Part Series of Breathing exercise; It is recommended that you practice part 1 and part 2 before attempting this third part.
Clavicular or Upper Lobe (of the lungs) Breathing
Benefits of Clavicular Breathing
Technique for Clavicular Breathing
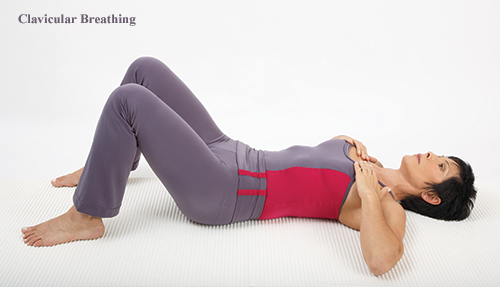
If you have practiced the first two parts, assume your preferred position. Place the thumbs under the armpits with the fingers in front of the chest, palms facing downward and the forearms parallel to the floor.
With each inhalation feel the fingers slide away from each other as the upper ribs open. Allow the breath to be drawn all the way up and under the shoulders. Relax the shoulders down, even as the breath lifts the upper lungs. With each inhalation feel your breath moving to the inside of the shoulder blades, and with each exhalation, allow the shoulder blades to rest down the back of the body.
Feel the upper spine lengthen with each inhalation. Feel the heart expand and allow the upper lungs to open fully. Feel the collarbones and sternum lifting up toward the chin.
With each exhalation, allow the collarbones to relax and soften. In order to feel the upper chest breathing fully, take short sniffs through the nose which automatically activates upper lobe breathing.
Be aware, this type of breathing can be overheating for people with conditions related to stress.
As a reminder, the first step in working with three-part breathing is to develop awareness in each of the main breathing areas. Try to become totally familiar with your natural breathing prior to learning to control or regulate your breathing. Awareness is the key to your ability to identify when you might use this practice as a tool for optimum health.
~~~~~~~~~~~~~~~~~~~~~~~~~~~~~
“Feelings come and go like clouds in a windy sky. Conscious breathing is my anchor.”
-Thich Nhat Hanh
Archived Exercise Plans
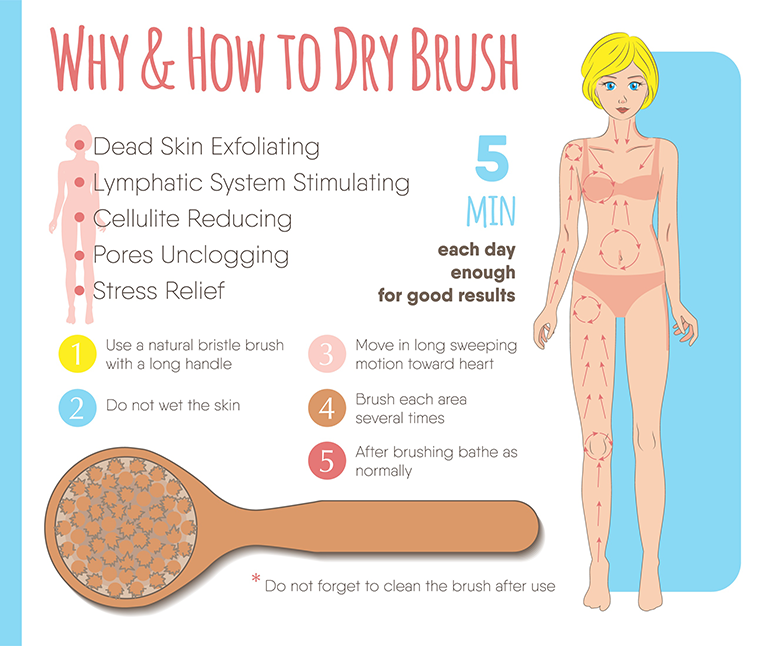
Exercise Plans - Why and How to Dry Brush
This exercise is not an exercise in the manner that you would typically think of. Rather, it is a daily practice that can be added to your bath and body care routine. This exercise is intended to move lymph, a clear and colorless fluid derived from the Latin word lympha, meaning “connected to water”. Lymph is derived from blood plasma. Plasma delivers nutrients and removes debris from the body’s cells. Most plasma returns to the venous circulation and continues as venous blood. What does not return becomes lymph in the lymphatic system, a system similar to and mostly parallel to, the circulatory system. It is comprised of a network of vessels that travel through our tissues. The lymphatic system functions primarily to maintain fluid balance (homeostasis) in the blood versus the tissues, defend against foreign invaders and facilitate fat and fat soluble nutrient absorption.
Lymphatic vessels are a network of branches, traveling through the body’s tissues and returning fluid to the veins from these tissues. Lymph drains from smaller to larger vessels with the goal of reaching two main channels, the lymphatic ducts in our torso, to return to the venous blood.
Lymph, unlike blood in our circulatory system does not have a pump to move it through the series of vessels and our bodies. It is interesting to note that the blood returns to the heart and lymph drains toward the heart. This is an important fact to note for this exercise. The lymphatic system does not have a pump such as the heart in the circulatory system. Movement of lymph requires contraction of muscles through exercise and movement. Another great reason to exercise daily! Stimulation from an outside source such as dry brushing is also helpful.
For those unfamiliar with the technique of dry brushing, it involves daily body massage with a dry, stiff-bristle brush. In addition to being a wonderful way to exfoliate the skin, dry brushing helps the detoxification process by increasing blood circulation and lymph flow. A dry brush is used so that the skin will not be robbed of its moisture as in the case of a hot water shower. There are brushes designed specifically for this practice. It is best to use a natural, stiff-bristled brush with a long handle. A long handle will allow you to reach your back. A variety of bristles are available and depending on your skin sensitivity and preference, choose one that will not create irritation.
The method for dry skin brushing is to brush toward the heart. Start at the ankles and work your way upward in long fluid strokes on the limbs and circular motions on the knees, hips and shoulders. Brush in circular motions on the front torso. Brush in upward strokes on the back. Always move in the upward direction. Lighten the pressure as you need in sensitive areas such as the breasts and abdomen. Just a few strokes per area is enough. Be careful not to go over one area too long. Once per day prior to your shower is a good routine to develop. Not only will you assist movement of your lymph, you’ll remove dead skin cells and flaky skin. There are just a couple of precautions to mention. Do not brush skin with cuts, scrapes, burns etc. If your skin becomes irritated or inflamed, stop the practice. Another option if your skin is too sensitive is to a brush with a dry wash cloth.
5 minutes each day is enough for great results!
Exercise Plans - Have you heard of Super Brain Yoga?
 |
It happens to all of us at some point, we have a great idea and before we can write it down, poof, it’s gone. Don’t you wish there was some miracle drug, food or drink that would allow us to remember everything we want when we want? Like a computer or recording device we would be able to replay every thought we ever had right when we need it.
That sounds great but scientists have recently discovered that we really do need to forget some things. We can remember a house we once lived in or a car we used to own, but do you truly remember every detail of each room or the exact layout of the dash and console in the car?
Big important memories are always there but our brains push little details to the back to make room for new ones. But what about those times when it’s really important to remember the little details? What can I do to help my brain remember more things and not let them retreat back into the recesses of my mind?
While there are no miracle cures out there, that we know of, that can give us superhuman memories, there are some things that can help. One in particular has been proven to help; and here’s a hint, it’s not food, drinks or supplements. Read More...Opens as a .pdf in a new window.
 |
Adobe Acrobat Reader is required to view .pdf documents. (click here for free download) |

Contact Us with any comments, questions or concerns so we may better serve you.